Travel photography equipment goes beyond traditional camera gear. These near compact, durable pieces of gear will help you shoot your adventures—and the rest will help you edit them in post.
Table of Contents
The Best Travel Photography Equipment

I wish it were as easy as keeping all of my travel photography equipment on a shelf in my room. I would have several camera bodies, loads of lenses and tons of extra camera accessories.
As a travel photographer, I have to be very careful about the camera equipment I have, because the more I have, the more I have to carry.
That being said, in this day and age, a lot of camera equipment is digital. Post-processing travel photos is just as important as using the right equipment to shoot them, so some of the best camera equipment for travel is no heavier than the laptop I carry.
That said, these 14 items should be in every travel photographer’s kit.
-


The first thing any travel photographer should invest in, after a body and the right lenses, are filters. There is an endless number of filters on the market, but the first one to get is a circular polarizing lens, or CPL for short.
Essentially, a circular polarizer diffracts light differently than the glass on your lens and, as such, it produces a different visual effect. It’s especially helpful for “erasing” reflections from your photos, especially in cases where you’re shooting the ocean (which reflects the sun extremely brightly), and it also creates more vivid, vibrant colors in your photos.
If you’re shooting in the broad daylight, a CPL is a must, as it deflects the glare from the sun away from the camera and prevents them from entering the lens. It’s also ideal for shooting any surface which might produce a reflection.
With any filter, you run the risk of losing sharpness and of changing the color or white balance (this is called a color cast). And while this can be easily corrected in post-processing (there are great editors like Luminar Neo and Adobe that allow you to do that effortlessly), I prefer to get the shot right, straight out of the camera.
Breakthrough’s X4 CPL is sharp as a tack with no visible color cast. They’re a relative newcomer to “the filter game,” which means they don’t have quite the same level of market penetration as the rest, but the quality of the product is clear.
I have one of these filters for each of my lenses, and they stay put for 99% of the photos I take.
Mind you, Breakthrough filters are more expensive than the others, but not by a lot, and as is the case with any travel photography equipment—you get exactly what you pay for.
-


Formatt Hi-Tech is the current leader in quality neutral density filters. If you plan on taking long exposure photos—a staple of landscape photography—you’re going to need a set of ND filters.
Neutral Density filters do one thing: They reduce the amount of light that enters the lens. This means you can leave the shutter open for longer without over-exposing the image. If you want to take those long, silky shots of waterfalls, or smooth the surface of the ocean, or catch light trails from moving cars, you’re going to need an ND filter.
A Graduated Neutral Density filter, on the other hand, has a ND filter on the top half of the glass and is fully transparent on the bottom half. This is especially useful for shooting sunsets or any landscape where the sky becomes overexposed and the foreground is underexposed. When you place the GND along the horizon, you darken the sky, giving you a more evenly exposed photo.
Formatt Hi-Tech makes two lines of filters—their standard filters and the Firecrest line—with the latter being the clear leader regarding quality and build. Firecrest filters use carbon neutral coatings to reduce color cast. The glass is then coated with bonding for an extra layer of durability.
While you could buy each filter individually, the Elia Locardi Signature Edition kit is actually the perfect set of ND filters for most travel photographers. It comes with these Firecrest filters:
- Ultra 4 stop ND
- 100mm Filter Holder
- Ultra 10 stop ND filter
- 82mm Ultraslim polarizer
- Ultra ND Soft Edge Grad 0.9
If you haven’t heard of Elia Locardi, he’s one of the most well-respected travel photographers out there with one of the most comprehensive travel photography courses you can buy. Check out his photography course here.
-


This is one of my all-time favorite pieces of travel photography equipment.
Peak Design makes some of the most well-thought-out camera accessories I’ve seen, from bags to straps to clips. The CapturePRO Camera Clip is a mount that attaches to your belt or to the front strap of your backpack, and it holds your camera body (or spare lens) to whatever you’ve attached it to.
It allows you to clip and lock your camera—lens and all—straight to your body, in the most hands-free way possible. In fact, it’s the only other feasible way I’ve seen to carry your camera other than a shoulder strap.
And better than any strap, the Capture Clip Pro keeps your camera exactly where you need it and always within an arm’s reach.
-


The CapturePRO is no substitute for a camera strap, though. Every photographer needs one, and while the standard straps that come with DSLRs and mirrorless cameras work fine, there are some much better options out there.
I personally love the Peak Design Leash, which is an ultra-thin, ultra-light strap made from ultra-durable material. It’s simple to adjust, and with their patented “clip-on, clip-off” system, removing the strap when you don’t need it is easy as pie. Plus, because it’s so small, you can just stash it in your pocket when you’re not using it.
-


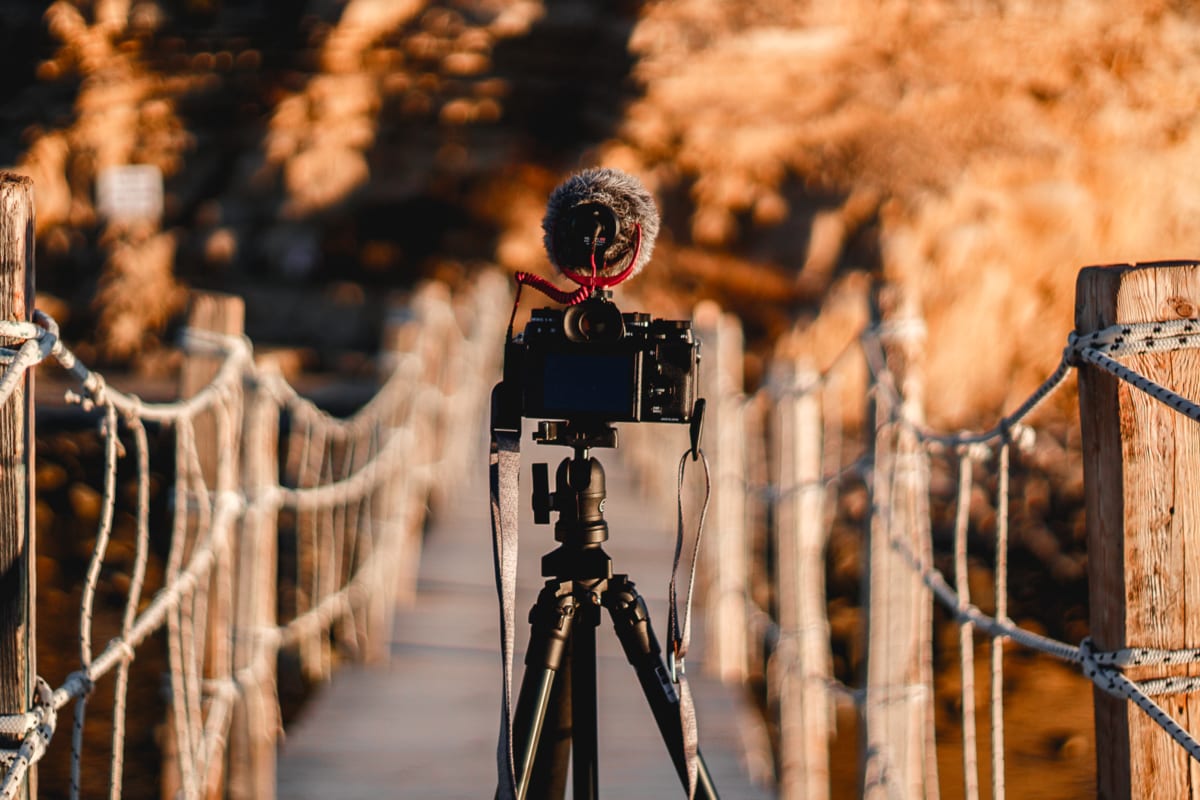
My entire travel photography equipment system is based on two primary factors—size and cost. The Manfrotto BeFree Compact Travel Carbon Fiber Tripod ticks both boxes.
At only 2.4 pounds (1.1kg) and 15.75 inches (40 cm) when folded, it’s an extremely viable option for traveling. Most tripods are large, heavy, clunky or all three, but the BeFree Compact isn’t any of those things.
It runs for about $265 USD, and easily fits into a standard-sized suitcase or slides into the water bottle pocket of most backpacks on the market. It’s impossibly easy to carry. I’ve traveled with this tripod for four years and have never even considered a so-called upgrade.
You can’t beat this tripod for the price.
-


When you need a tripod in a pinch, the Joby GorillaPod SLR-Zoom gets the job done. It’s just 9.8 inches (25cm) long and holds 6.6 pounds (3kg).
Stand it on its own as a small tripod (you might discover some interesting perspectives this way!) or you can wrap its flexible legs around any railing, pole, or fence—meaning you can get exactly the angle you want.
Made internet famous by Casey Neistat, this is also an excellent grip for shooting video and especially self-facing vlogs.
Note: You’ll need the Joby Ball Head which sells for $25.
-


Intervalometers serve multiple purposes and are used in a variety of situations. And Vello makes the gold-standard for all cameras, used by pros the world over.
First and foremost, a wireless intervalometer acts as a wireless shutter. If you want to take travel photos with yourself in them, set your camera up on a tripod, stand in position (hide the remote switch in your hand), and press the button. This is the secret to taking your own photos on the road!
Secondly, intervalometers are an essential piece of travel photography equipment for long-exposure photography.
Without an intervalometer, even though your camera is on a tripod, the simple act of pressing the camera shutter with your finger can cause camera shake, resulting in blurry photos. If you want crisp long-exposure photos, you need to reduce as much camera movement as possible.
With a wireless intervalometer, you can press the shutter button without ever touching your camera.
You could also set a two- or 10-second timer, but I find using the ShutterBoss to be the most effective and failsafe solution.
Lastly—intervalometers have a much more comprehensive set of exposure options than even the most sophisticated cameras. If you want to shoot star trails, for example, you might need to take one photo, automatically, every 30 seconds for an hour. While you can’t do this in-body, you can do this with an intervalometer.
Or, let’s say you want to take a five-minute long-exposure (you’re going to need some ND filters for that!). Most cameras won’t let you set a shutter speed this long. But, of course, an intervalometer will!
-


For retouching or selective, local adjustments, using a mouse to draw certain effects on your photo doesn’t cut it. You simply don’t have the same level of control as you would if you were using a pen.
Enter the Wacom Intuos Photo Tablet! It’s a pressure-sensitive drawing pad for your computer that makes local adjustments much, much easier. Need to brighten a very specific part of your photo? Just draw it in. Need to desaturate the color of your shirt, but nothing else? Just draw it in!
Fine-tuned adjustments like these are impossibly difficult with a mouse but are made incredibly easy with a Wacom. It takes a little getting used to at first, but once you’re comfortable with using it, you’ll wonder how you ever edited photos without one. I did, anyway!
-
While many travel photographers are die-hard fans of one brand or the other, I find both Lexar and Sandisk to be equally as good. Both brands are excellent and make memory cards for every piece of travel photography equipment you might own—from your camera to your GoPro to your drone.
You should never carry just one SD card for each camera, though. It’s important to have extras on hand in case you fill one up during a big day of shooting, and you still have more shots to take!
Just last week I was flying in a helicopter over Oahu, Hawaii when I ran out of space on my memory card! Luckily, I had an extra one on hand, swapped them out, and kept on shooting.
Depending on how much shooting you do, I recommend carrying multiple 32gb or 64gb cards.
It’s also important to keep extra SD cards on hand as a part of your backup solution. Worse than losing your camera is losing your photos, so making sure you keep your photos on an SD card until they’re backed up in at least two other places.
-


You’ll never have the space to be able to store all your photos on your computer’s hard drive, so an external drive is an essential piece of travel photography gear.
And, as a former IT technician, I’ve seen the perils of hard drive crashes. Sometimes they happen because of poor build quality and sometimes they happen because you accidentally drop your drive on the ground.
As a traveling photographer, my equipment gets put through its paces, and LaCie makes drives that are meant to withstand the most rugged conditions (aptly named, isn’t it?).
LaCie drives are actually Seagate drives on the inside, one of the best hard drive manufacturers on the market. Each drive is protected by a rubber casing meant to absorb the impact of drops or other wear and tear.
They make drives from 1TB to 4TB, depending on how much shooting you do and how much space you need. Video, of course, takes up a lot more space.
I travel with about 10TB of hard drives.
-
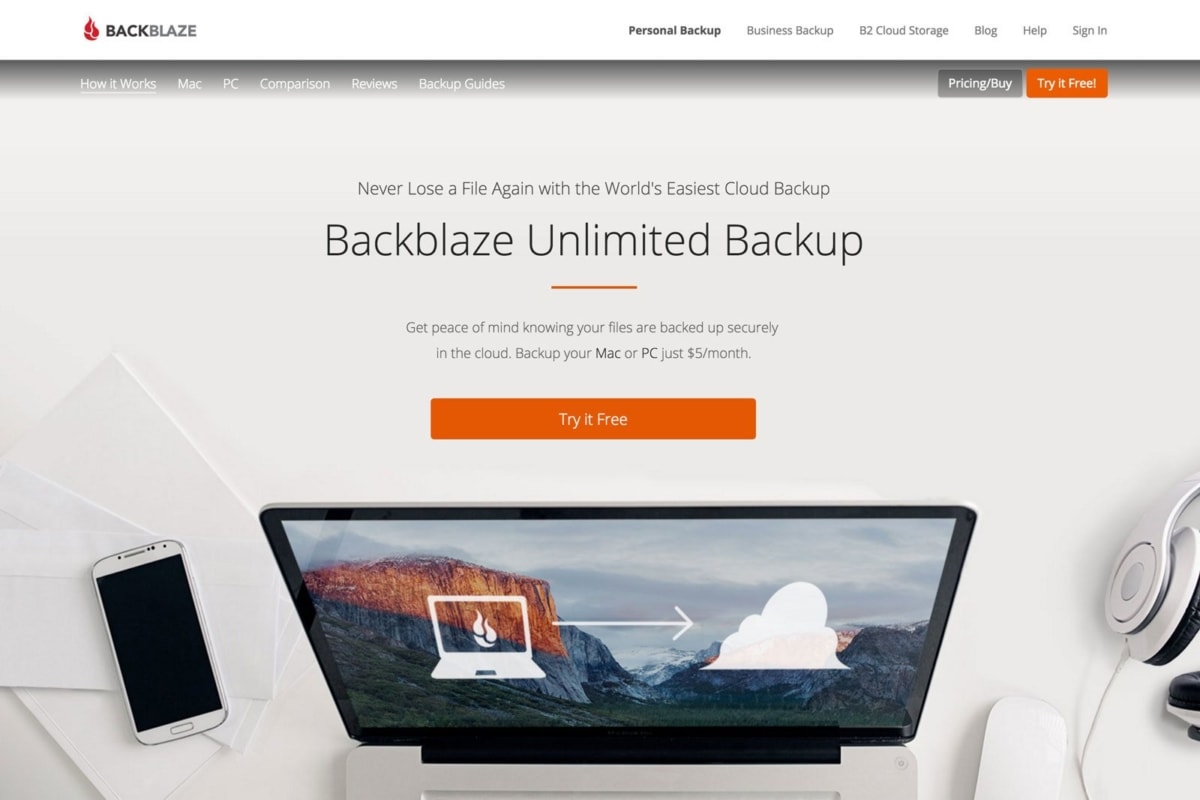

To that end, backing up your photos is almost as important as taking them. Backblaze takes continuous backups of your files in real time. And it keeps them safe and secure in the cloud.
You want to store your photos in at least two places. If you lose them in one place, you’ll have everything backed up in another.
From my SD card, I transfer photos to my 4TB LaCie hard drive. Backblaze then automatically backs up my photos from my hard drive to the cloud. Once I know the photos are stored on my hard drive and online, I go ahead and delete the images from my SD card.
As an extra precaution, I carry a second hard drive that acts as a third backup. You can never be too careful!
-


I go through camera backpacks at a rate of about one every three months. The only one that’s stuck with me, however, is the Pacsafe Camsafe. It comes in two sizes (and, yes, of course, I own both!)—17 liters and 25 liters—depending on the size of your camera kit.
What I love most about the Camsafe line of bags from Pacsafe is not only the anti-theft features (lockable zippers, puncture-proof fabric, and more!), but also the design. It’s not a bag meant for photographers. It’s a bag meant for traveling photographers.
Whereas other bags lack sufficient space to carry anything other than camera gear, Pacsafe has brilliantly designed a bag that fits it all. The bottom half is reserved for camera gear (each size holds a different amount of gear). And the top half is an open pocket for carrying lunch, extra clothes, hard drives, other electronics or cables. It can also hold anything else you might need to carry with you for a day—or weeks—of shooting.
This is the perfect bag to keep all of your travel photography equipment safe and sound.
-
Adobe Lightroom
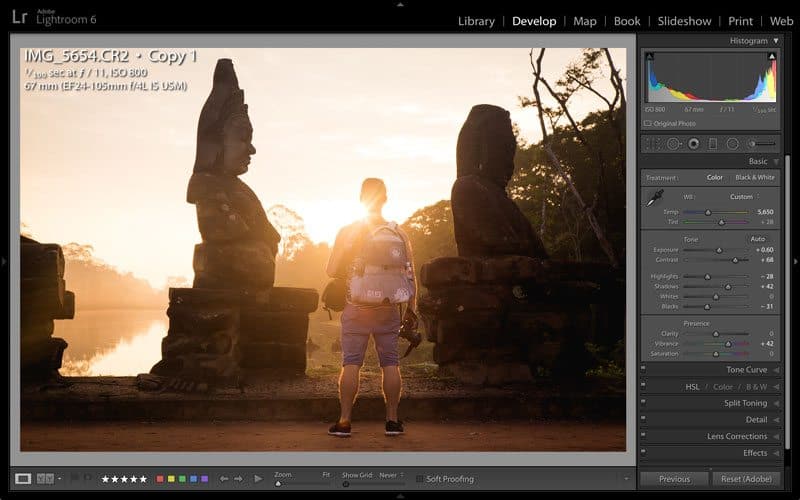

Adobe Lightroom is the gold standard of editing software and the go-to choice for 99% of photographers around the world. It’s a feature-packed piece of software for both organizing and post-processing your photos.
Years ago, Lightroom was primarily meant to organize your photos. Meanwhile, Photoshop was meant for more intensive editing. Nowadays, Lightroom has an impressively robust organization system for your photos. And it’s totally customizable to your workflow (here’s one I recommend).
In recent years, Lightroom has incorporated a sophisticated set of editing tools that are simple and easy to use. They’re simple enough for beginners and advanced enough for the most professional photographers.
Adobe also recently launched Lightroom CC, a mobile-friendly version of the app. Sync your photos across all your devices and even take some of those advanced editing features with you, right in your pocket.
For $9.99/mo, you get full access to Adobe Lightroom and Adobe Photoshop—the second piece of software you should get acquainted with if you want to learn how to retouch your photos.
-
Lightroom Presets
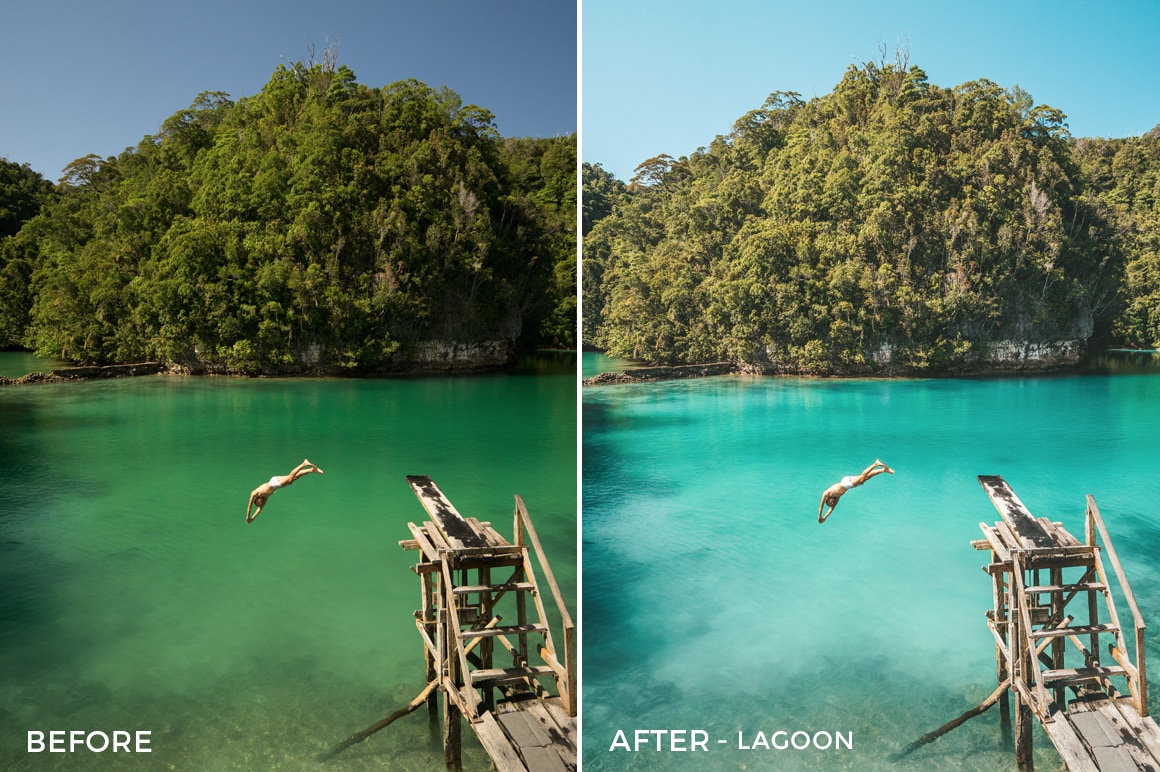

Lightroom presets by Jackson Groves—an easy way to make your photos look better fast. Every good travel photographer has a consistent style that’s uniquely theirs. When someone sees a photo, they should be able to instantly recognize it as a piece of your work. This is something I’m still working on perfecting. But the easiest way to achieve consistency in your photos is by using Lightroom Presets.
They’re also a fantastically simple way to save an incredible amount of time in the post-processing phase.
Put simply, presets are “filters” that work in Lightroom. Many great photographers and Instagrammers sell their presets online. So I recommend researching your favorites and finding out if they have preset packs you can buy.
One thing to remember—don’t steal their style! Use their style as a base and create something that’s uniquely yours. As Austin Kleon said in the famous book Steal Like an Artist, “Start copying what you love. Copy copy copy copy. At the end of the copy, you will find yourself.”
These are a few of my favorite presets from some of my favorite travel photographers:
Adventure Travel: Jackson Groves Presets
Travel and Nature Lifestyle: Jorden Tually Presets
Travel, Adventure, Lifestyle: Jacob Presets
Travel and Lifestyle: Travel in Her Shoes Presets
Travel and Lifestyle: The Blonde Abroad Presets
Moody Landscape Photography: Dylan Furst Presets
Subtle Moody Landscapes: Jannik Obenhoff Presets
-
If you’re the kind of person who loses a lens cap every other week, get a universal lens cap from KUVRD. The ULC fits any lens with a barrel diameter between 60-150 mm, which covers just about any DSLR lens or mirrorless camera lens.
This lens cap works so well because it stretches to fit over your lens and then remains tightly secured around it. It also fits both the front and the back end of the lens.
The ULC is shock-absorbent and helps fight off dust, water, and dirt. If you’re sometimes a little rough with your lenses (especially if you spend a lot of time shooting outdoors), you need this cap. One cap retails for $30 USD, but the more you bundle the cheaper it gets. A 10-pack is just $150 USD.


When it comes to travel photography, and especially the gear you use, there is no one-size-fits-all solution. You have to find your style and find what gear works best for you.
And you don’t need to go out and buy every product on the list at once! Upgrade slowly, adding to your kit as it becomes necessary. After years of travel photography, I’ve found the above products to be essential to my kit. But that’s just me.
Find what works for you and your style. After all, photography is an art form—only use the brushes you need.
READ MORE: The Best Mirrorless Cameras for Travel
Travel Photography Gear FAQs
-
How do photographers travel with their gear?
Many photographers use a dedicated camera backpack with padded dividers for their camera gear.
-
What is required to be a travel photographer?
All you need to be a travel photographer is a camera, some knowledge of how to use it, and a sense of adventure.
-
Can I carry my camera on a plane?
Yes, you can carry your camera on a plane in your carry-on bag.
-
Is it hard to be a travel photographer?
Being a travel photographer is as easy as taking a camera on your next trip, but turning that into a full-time living takes time and dedication.
-
Will TSA check my camera?
TSA usually won’t care about cameras, but they may occasionally ask to inspect it closer.
About the Author
Jeremy Scott Foster
Jeremy Scott Foster is an adventure-junkie, gear expert and travel photographer based in Southern California. Previously nomadic, he’s been to ~50 countries and loves spending time outdoors. You can usually find him on the trail, on the road, jumping from bridges or hustling on his laptop working to produce the best travel and outdoors content today.
Oooo, definitely am going to check out those Lightroom presets – I only just started using Lightroom, and it definitely can be a time suck if you spend time tweaking every single photo to get it just right. These sound perfect!
Hey Jeremy, the Tenba Messenger Bag seems like a good all round bag, I particularly also like the Miggo Agua Camera Bag which is waterproof too. But I will certainly look into the Tenba bag as I am in the market for one now. Thanks for some great camera gear. Safe travels.
Hey Reinardt! The Tenba is a fantastic day bag, and it does come with a rain cover. It’s not meant for water sports, but it’s great for daily exploration!
The rain cover is all most of us need anyway, it seems like a really good all-round bag then. Cheers.
Great timing- I’m in the market for a tripod and so far have been disappointed with many of the options. That Induro sounds like a good one and 2.6 lbs is not bad for a quality tripod.
Yeah that was my biggest struggle. But the Induro is really great quality and it’s small enough to travel with. I can’t recommend it enough!
Hoya Circular polarizers can be good too to more pop to clouds and make colours more vibrant.
Dave
That’s definitely true in most cases. However, using a wide angle lens for landscape shots, like I am, results in banding and uneven skies 🙁
This is really helpful. I am just starting with photography (beyond point and shoot) and having a hard time choosing gear.
Glad I could help. Let me know if you have any questions.
What do you recommend for underwater photography equipment while on the road?
I’d recommend getting an underwater case for your DSLR. They’re kind of bulky but it’s really the best option.
Thanks for sharing your gear & for the informative video. I love photography but am nervous about traveling w/my camera & parts! I also neesed new options for gear! Very practical!
That’s a brilliant list and I am always on the lookout for new accessories for my camera especially for when I am travelling. I’ve only recently started carrying an external hard drive with me and just about started using Lightroom so a lot to learn there. The Tenba bag looks really nifty and something I need to change anyway soon. Thanks for all the information.
Glad it was helpful! An external hard drive is a must–photo and video take up SO much space!
Maybe these 14 things have helped other photographer’s photo perfect, maybe these are my shortcomings, I will add them now.